
A Virtual Private Server (VPS) is a virtualized computer within a larger physical server. It acts like an independent server, offering dedicated resources and control at a lower cost than a full physical machine. VPS hosting uses this setup to give users private, customizable environments for web hosting or applications. Some reputable VPS providers include DigitalOcean, Linode, and Vultr — I currently use DigitalOcean.
A Droplet in DigitalOcean is basically a virtual private server (VPS) — a self-contained Linux machine running in the cloud. You choose its size (CPU, RAM, disk), location (data center region), and operating system (Ubuntu, Debian, Fedora, etc.). Once created, it behaves exactly like a physical server you might have in your lab or office — except it lives on DigitalOcean’s infrastructure.

ssh root@the server IP #example: ssh [email protected]

Once connected, the prompt changes from C:\Users\agron> to root@ubuntu-s-agronomy:~#, indicating that you’ve entered the virtual Linux environment on your VPS.
If you close Command Prompt, the VPS disconnects. To reconnect, you need to run ssh root@<server IP> again. You can also use DigitalOcean’s Console to open a Linux terminal directly.

If you’ve created your own Virtual Private Server (VPS), you can now install RStudio Server.

1) System update
First, let’s update systerm.
apt update && apt upgrade -y

2) Install R
Second, let’s install R in the Linux environment of the Virtual Private Server (VPS).
apt install -y r-base
To verify that R has been successfully installed, run the following command.
R --version

R has been successfully installed.
3) Install RStudio Server
Next, let’s install RStudio Server in the Linux environment of the Virtual Private Server (VPS). When entering the following commands in Command Prompt, make sure to remove the #.
# wget https://download2.rstudio.org/server/jammy/amd64/rstudio-server-2024.04.2-764-amd64.deb
apt install -y gdebi-core
gdebi -n rstudio-server-2024.04.2-764-amd64.deb
If you run the following command, you can verify that the installation was successful. If you see “active (running)”, it means the installation was completed correctly.
systemctl status rstudio-server
Open the port in the firewall, RStudio Server uses port 8787.
ufw allow 8787
4) Create account for R Studio server
You can now create a user account and set a password.
adduser agronomy4future
usermod -aG sudo agronomy4future

Even though nothing appears when you type your password (for security reasons), it is actually being entered.
5) Connect
Now, open your local browser and go to the following address:
http://xx.xx.xxx.xx:8787
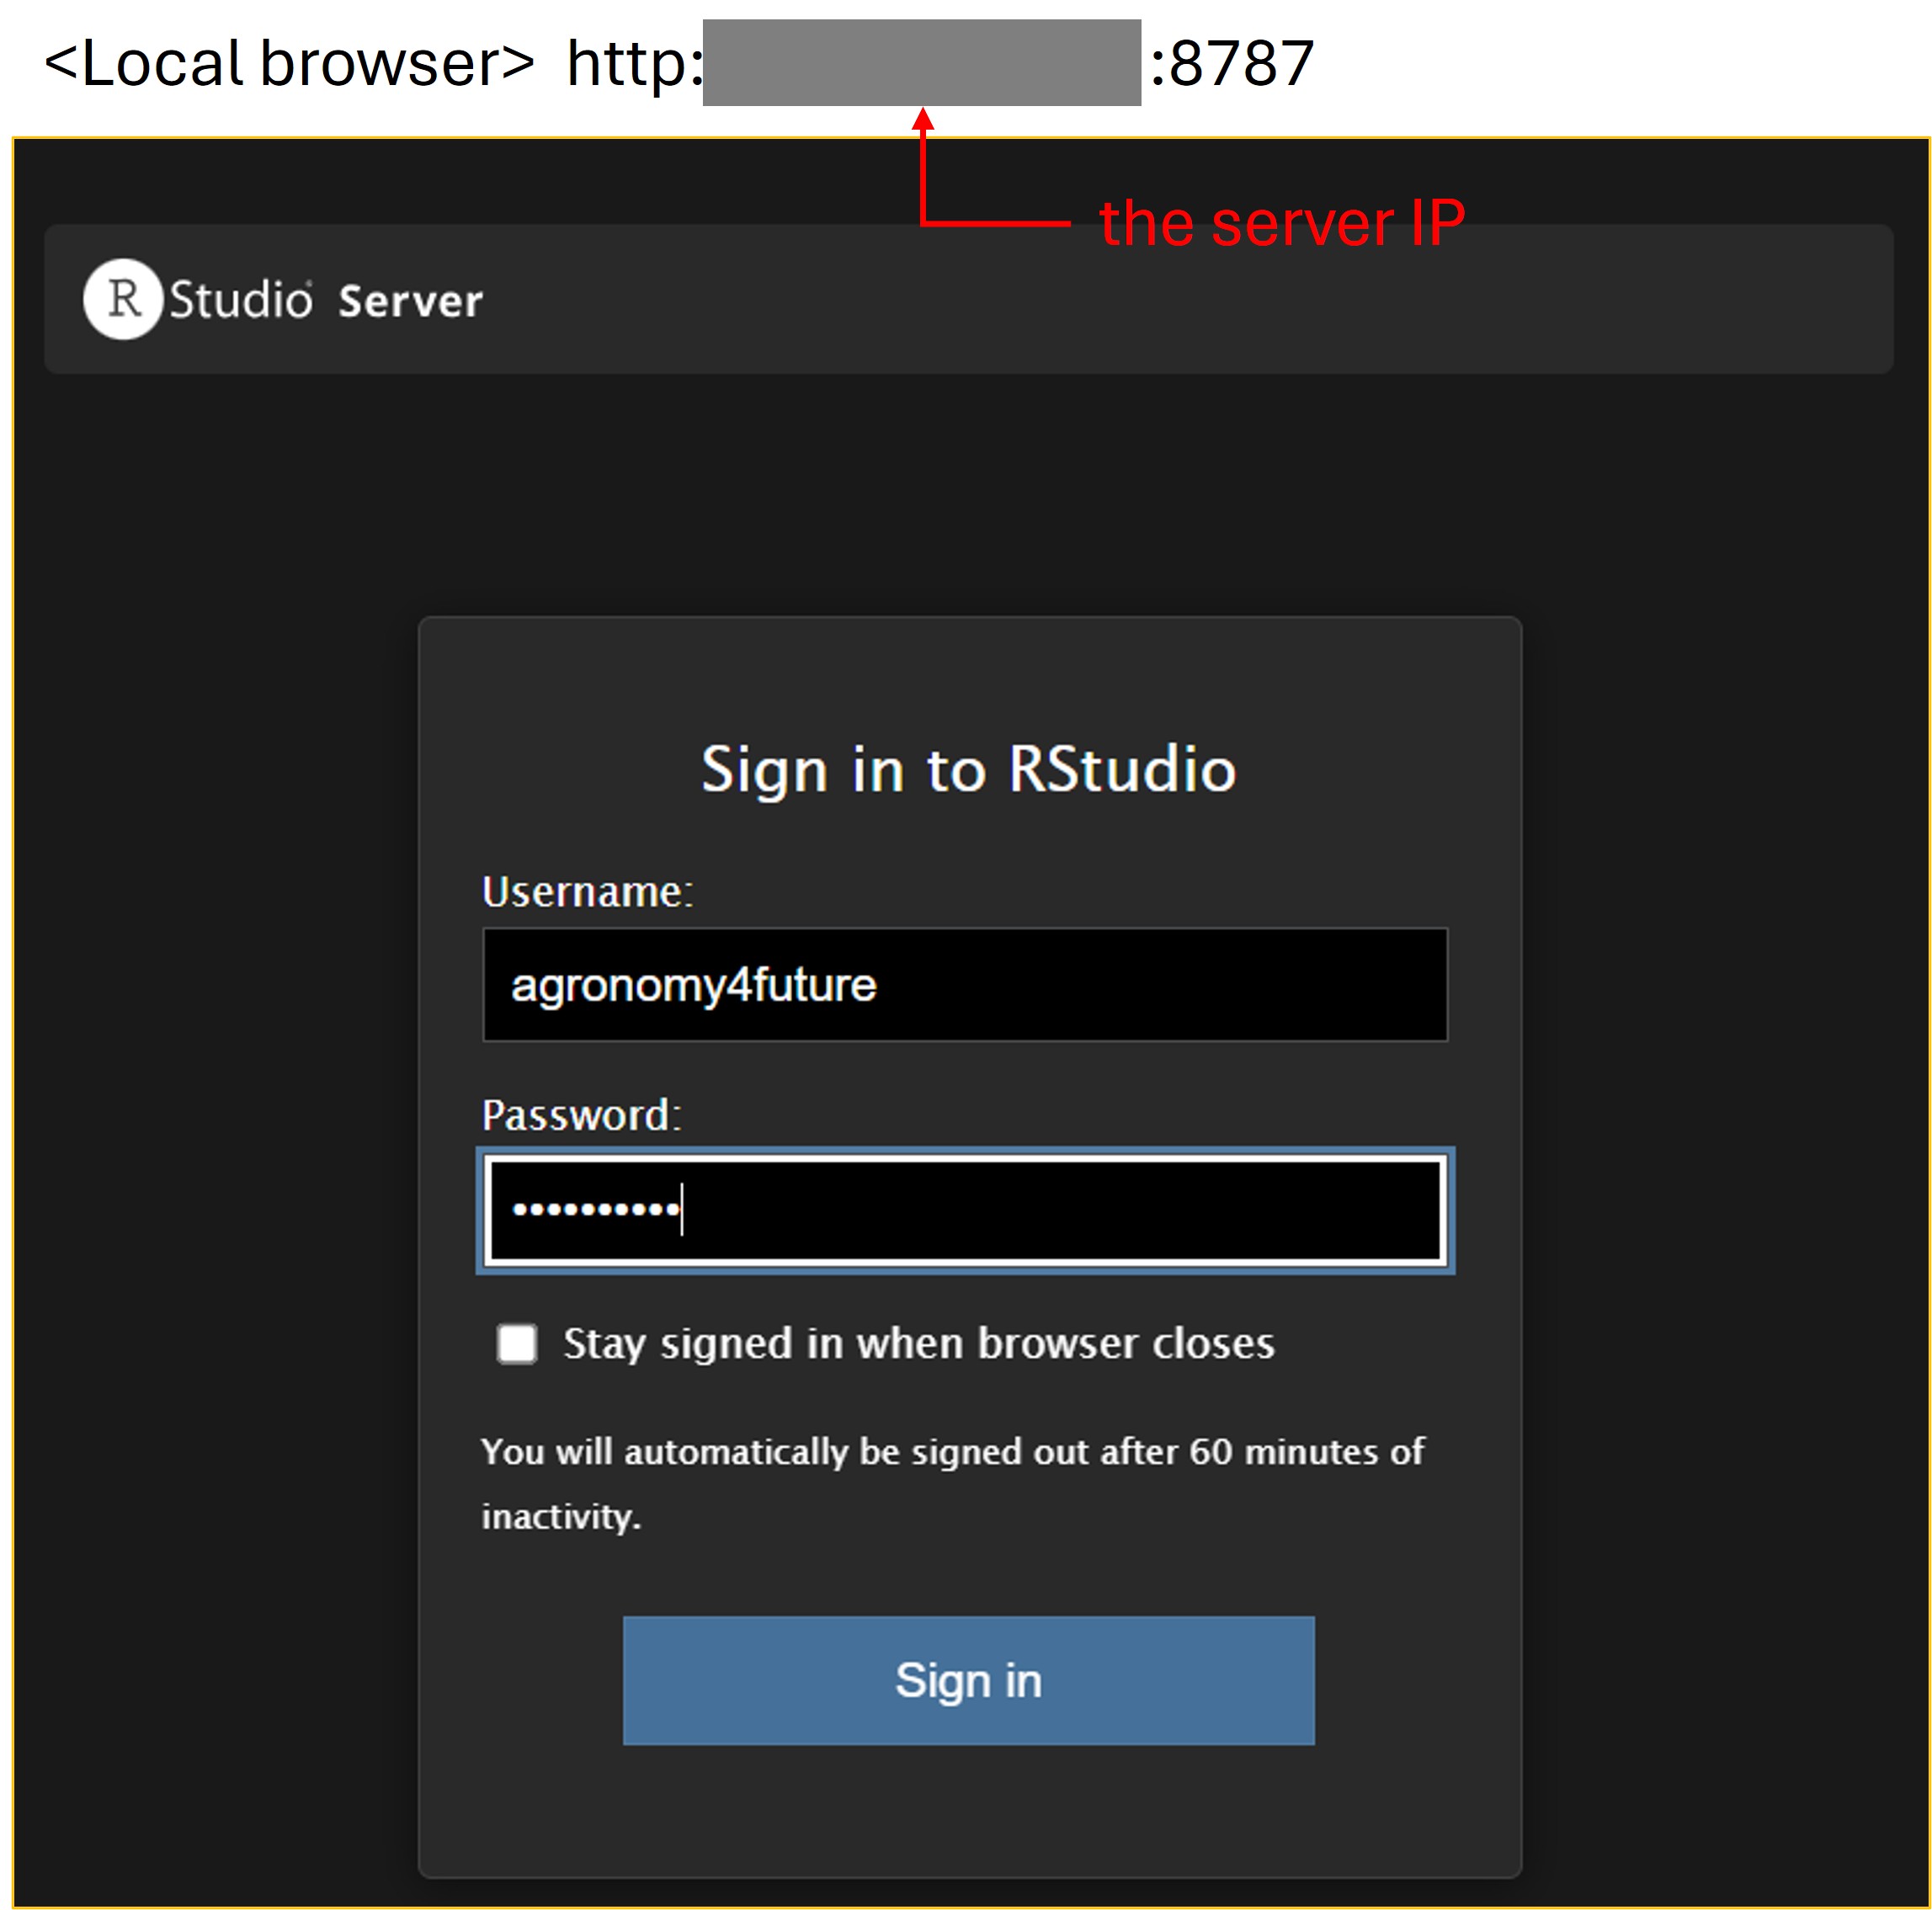
Then, enter the username and password you set up, and you can assess R Studo server.

■ Create a connection to the MySQL server using RStudio Server
Right now, I don’t have any files saved on my local PC. I don’t like storing Excel files on my computer because the data can sometimes be accidentally deleted. So, I moved my files to a MySQL server, and I now access them through MySQL. For more details, please refer to my previous post below.
We can import data from MySQL server to R studio, but R Studio is also saved in my local PC which means R files are saved in my PC, and I even don’t like this. That’s why I set up RStudio Server instead.
Please see the flow of the process below.
Data and R files are all stored in the cloud, so they appear as cloud-based files in the system. This means no physical data exists on my PC anymore.
Before exporting data from the MySQL server to RStudio Server, install the client development packages in the Ubuntu Linux environment using the command prompt.
sudo apt update
sudo apt install -y build-essential libmariadb-dev
Then, type the following code to access the MySQL database.
if(!require(RMariaDB)) install.packages("RMariaDB")
library(RMariaDB)

# Create a connection to the MySQL server
con= dbConnect(
  RMariaDB::MariaDB(),
  user     = "your user name",
  password = "your server password",
  host     = "your server host",
  port     = server port,
  dbname   = "database name", #the database you want to access
  ssl.verify = TRUE
)

and I want to display the data table sorghum_database from my database. Please refer to the SQL schemas in the image above for the definitions of a database and a data table.
query= "SELECT * FROM sorghum_database"

df= dbGetQuery(con, query)
head(df, 3)

Now, we can perform data analysis without storing any physical data on my PC, using data from the cloud server and RStudio Server, which can be accessed from anywhere.
■ Setup Jupyter Notebook on the Linux server
1. Update Your Server and Install Prerequisites
# system update
sudo apt update && sudo apt upgrade -y

# install Python
sudo apt install -y python3 python3-pip python3-venv
Let’s check Python3 is installed.
python3 --version

pip3 --version
2. Create and Activate a Virtual Environment
python3 -m venv ~/jupyter_env

source ~/jupyter_env/bin/activate
3. Install Jupyter Notebook
pip install --upgrade pip

pip install jupyterlab notebook
Let’s check Jupyter Notebook is installed.
jupyter --version
4. Setup Jupyter Server
jupyter notebook --generate-config
# Writing default config to: '/home/kimjk/.jupyter/jupyter_notebook_config.py'
5. Set a Password
jupyter notebook password
6. Create a working directory
mkdir -p ~/notebooks
6. Edit configuration file
nano ~/.jupyter/jupyter_notebook_config.py
and add the following code after the final line.
c = get_config()
c.NotebookApp.ip = '0.0.0.0'           # Enable external connections
c.NotebookApp.port = 8888              # Specify the port number
c.NotebookApp.open_browser = False     # Disable automatic browser launch on the server
c.NotebookApp.notebook_dir = '/home/kimjk/notebooks'  # working directory
7. Run Jupyter Notebook
jupyter notebook
8. Connect
Now, open your local browser and go to the following address:
http://xx.xx.xxx.xx:8888

If you close the command prompt, you can not access Jupyter Notebook Server. To access Jupyter Notebook Server, activate Jupyter Notebook as the following codes.
su - kimjk # switch to a non-root user
python3 -m venv ~/jupyter_env
jupyter notebook
We aim to develop open-source code for agronomy ([email protected])
© 2022 – 2025 https://agronomy4future.com – All Rights Reserved.
Last Updated: 19/Oct/2025